
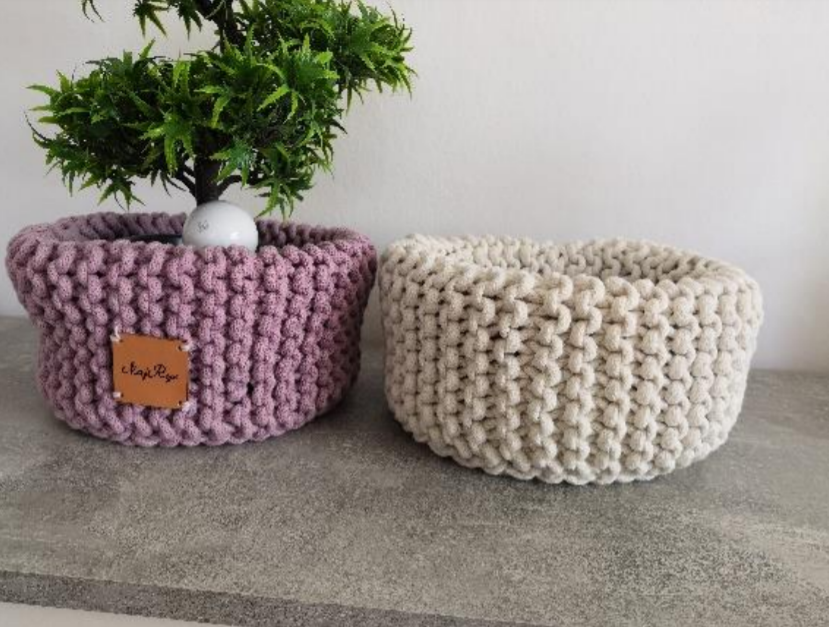
What will you need?
- Berry yarn – about 1 skein and a bit more (estimated 130 m)
- Crochet hook size 7 or 8
- Knitting needles size 8 or size 10 (depends on your tension; I knit tightly, so I use size 10)
- A needle with a large eye
- Scissors
- A decoration of your choice
- A leather label, wooden cut-outs, etc.
TIP: Crochet the bottom with a smaller hook and tightly so that it holds its shape well. When knitting, keep the tension tight; I do not knit the last stitch, I only slip it onto the other needle with the yarn in front, which makes it easier to sew to the bottom. If you do not know how to make a magic ring, have a look at the knitted pouf tutorial :) Another tutorial on how to crochet single crochet into the stitch or into the "V" can be found in the crocheted basket tutorial ☺
Abbreviations (US terms):
MR = magic ring
sc = single crochet
ch = chain
sl st = slip stitch
Instructions
1) Crocheted bottom
We crochet continuously in the round without closing with a sl st (except in the first round, where we use a sl st to join the stitches into a ring). We will crochet in a firm stitch.
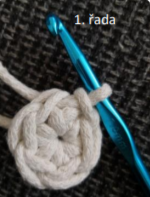
❖ Round 1 – start with a MR, work 6 sc into it, and finish the round with a sl st
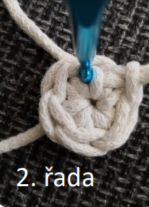
❖ Round 2 – Work two stitches into every stitch. However, we do not insert the hook into the stitch in the usual way, but directly into the "V" of the stitch from the previous round, so in the end we have 12 stitches. Do not finish with a sl st; mark the start of the next round and crochet without closing
❖ Round 3 – 1 sc, then increase in the next stitch (2 sc into one stitch); repeat this to the end of the round. That is: 1 sc, 2 sc, 1 sc, 2 sc ...
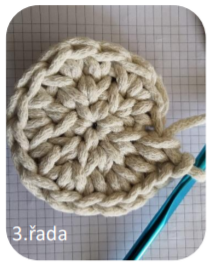
❖ Round 4 – similar to round 3; now we crochet: 1 sc, 1 sc, 2 sc (so we increase in every 3rd stitch)
❖ Round 5 – 1 sc, 1 sc, 1 sc, 2 sc (increase in every 4th stitch)
❖ Round 6 – 1 sc, 1 sc, 1 sc, 1 sc, 2 sc (increase in every 5th stitch)
❖ Round 7 – 1 sc, 1 sc, 1 sc, 1 sc, 1 sc, 1 sc, 2 sc (increase in every 6th stitch).
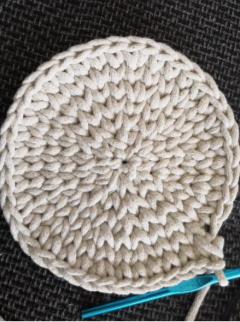
Finish with a sl st
That completes the bottom. If it curls for someone, either a different hook size will help, or, if that does not help, you need to adjust the increases (skip the increases in one round and just crochet around, then continue following the chart; with this pattern, however, this should not happen)
Weave in all ends on the side that will be inside the basket (the wrong side).
2) Knitted body of the basket
We knit garter stitch throughout (knit every row). I do not knit the last stitch, I only slip it onto the other needle with the yarn in front – see the picture:
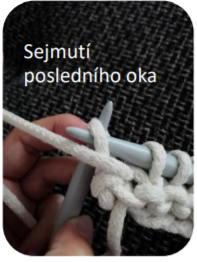
❖ Cast on 16 stitches (the number of stitches determines the height of the basket); keep in mind that half is folded over to the inside of the basket, so the final height will be half, for strength and neatness)
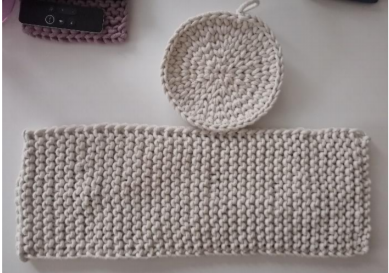
Knit a rectangle – 72 rows in total, always in garter stitch – a lot depends here on the tension of both the bottom and the body of the basket; I always hold it against the edge of the bottom so that the rows fit exactly the circumference of the bottom. So if you want to change the size of the bottom, you can easily adjust the size of the knitted rectangle to fit.
3) Assembly
❖ We have a crocheted bottom and a knitted rectangle that matches the circumference of the basket exactly.
❖ Now sew the knitted rectangle together, see the picture (front thread : side thread)
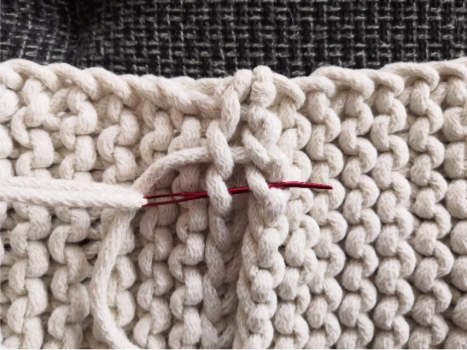
❖ After sewing, leave about 1 metre of yarn for sewing the bottom to the body of the basket and cut off the rest.
Weave in all the loose ends so that they are not visible.)
❖ Now sew the bottom and the body of the basket together, using the needle we used for weaving in.
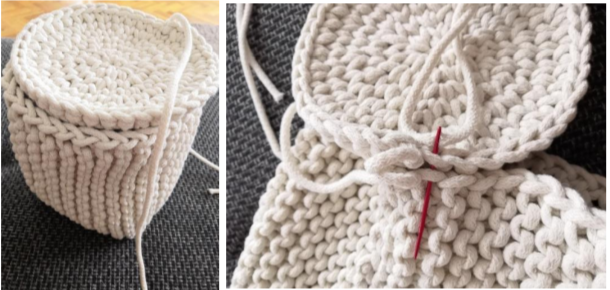
I sew behind the so-called "third thread", so that the last round is visible at the bottom; alternatively you can sew behind the back thread of the last round of the bottom: you simply pick up stitches back and forth and sew them tightly together – there are many ways ☺
❖ Weave in all the ends again and cut the yarn
❖ Now fold half of the knitted body to the inside of the basket, which firms up the basket. It can also be used this way as a vase, and by turning out the other part you can make the basket taller
Created for Tvorboshop by: NajRys
You can find more patterns on Fler: NajRys
The patterns are for personal use only. Please do not share them further without permission and do not post the pattern in groups on the internet; it is not free for distribution. Please respect copyright. Thank you